

The moment you taste an Orange Creamsicle, you’re hit with sunny citrus and silky vanilla—simple, nostalgic, and beyond refreshing. This version keeps the classic flavor you remember while using real ingredients for a cleaner, brighter taste. It’s quick to make, kid-friendly, and perfect for hot days or a cheerful pick-me-up.
You’ll only need a blender, a few pantry staples, and some patience while it freezes. Make a batch today and you’ll have a freezer full of little bursts of summer.

Ingredients
Method
-
Prep the oranges: Wash and dry your oranges.
Zest them first, then juice until you have 1 cup. Strain the juice to remove pulp if you prefer a smoother pop.
-
Warm to dissolve sweetener: In a small saucepan over low heat, whisk the milk, cream, and honey (or sugar) just until the sweetener dissolves, 1–2 minutes. Do not boil.
Remove from heat and cool slightly.
-
Blend for a silky base: In a blender, combine orange juice, zest, vanilla, salt, the milk-cream mixture, and Greek yogurt if using. Blend on medium for 20–30 seconds until smooth and slightly frothy.
-
Taste and adjust: Taste the mixture. Add a little more honey for sweetness or a squeeze of lemon if you want brighter acidity.
The flavor should be bold since it will mellow once frozen.
-
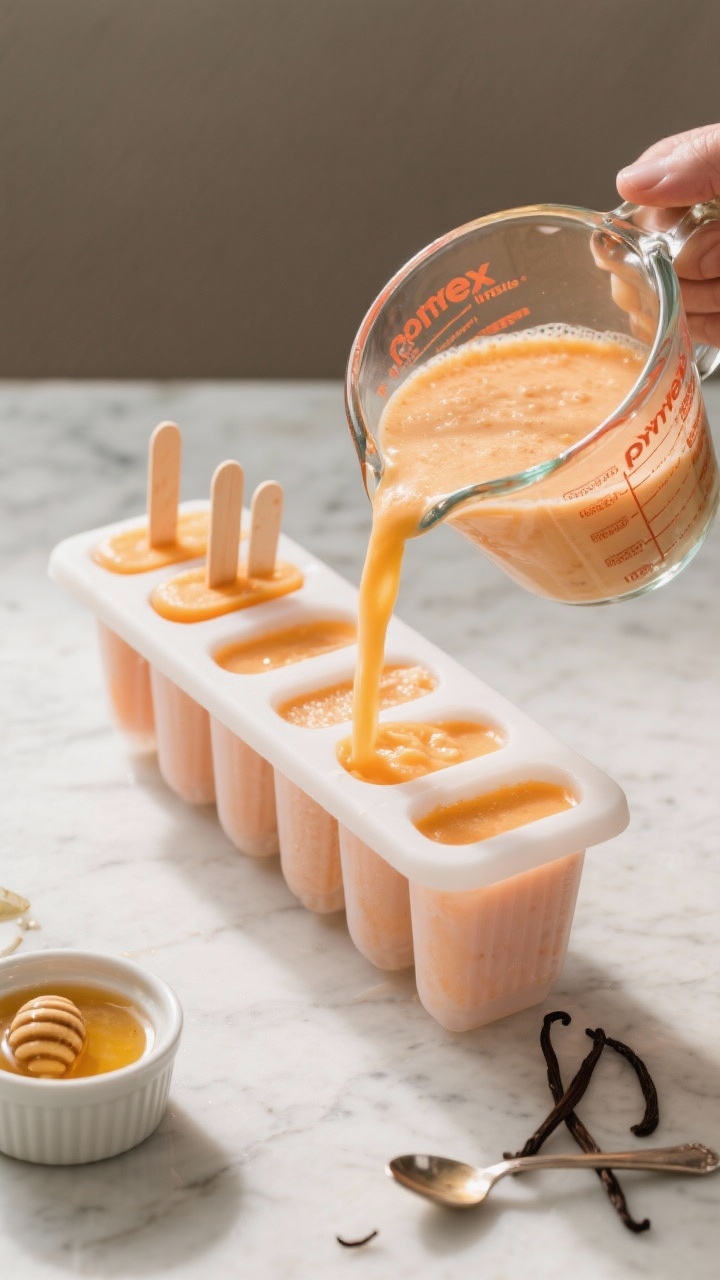
Pour and freeze: Divide the mixture into popsicle molds, leaving a tiny bit of space at the top for expansion. Insert sticks.
-
Freeze fully: Freeze for 4–6 hours, or overnight for best results.
-
Unmold with ease: Run the molds under warm water for 10–15 seconds to release. Twist gently and pull out the pops.
-
Serve: Enjoy immediately, or store as directed below to keep them fresh.
Why This Recipe Works

This Orange Creamsicle recipe balances tangy citrus with smooth, sweet cream. The secret is using both orange juice and zest for big flavor, then adding vanilla to recreate that iconic creamsicle vibe.
A touch of honey (or sugar) softens the acidity without making it too sweet. Whole milk and cream keep the texture rich and creamy, while a dash of salt enhances the orange. It’s reliable, simple, and tastes like the classic—just better.
Ingredients
- 1 cup freshly squeezed orange juice (about 3–4 oranges)
- 1 tablespoon orange zest (from organic oranges, if possible)
- 1/2 cup heavy cream
- 1/2 cup whole milk (or use just cream for a richer pop)
- 3 tablespoons honey (or 1/4 cup granulated sugar)
- 1 teaspoon pure vanilla extract
- 1 pinch fine sea salt
- Optional: 1–2 tablespoons Greek yogurt for extra tang and body
Instructions
- Prep the oranges: Wash and dry your oranges.
Zest them first, then juice until you have 1 cup. Strain the juice to remove pulp if you prefer a smoother pop.
- Warm to dissolve sweetener: In a small saucepan over low heat, whisk the milk, cream, and honey (or sugar) just until the sweetener dissolves, 1–2 minutes. Do not boil.
Remove from heat and cool slightly.
- Blend for a silky base: In a blender, combine orange juice, zest, vanilla, salt, the milk-cream mixture, and Greek yogurt if using. Blend on medium for 20–30 seconds until smooth and slightly frothy.
- Taste and adjust: Taste the mixture. Add a little more honey for sweetness or a squeeze of lemon if you want brighter acidity.
The flavor should be bold since it will mellow once frozen.
- Pour and freeze: Divide the mixture into popsicle molds, leaving a tiny bit of space at the top for expansion. Insert sticks.
- Freeze fully: Freeze for 4–6 hours, or overnight for best results.
- Unmold with ease: Run the molds under warm water for 10–15 seconds to release. Twist gently and pull out the pops.
- Serve: Enjoy immediately, or store as directed below to keep them fresh.
Storage Instructions
- In the mold: Keep pops in the mold for up to 1 week, covered to avoid freezer odors.
- Out of the mold: Unmold, then wrap each pop tightly in parchment or wax paper and place in a freezer bag.
Squeeze out extra air to prevent ice crystals.
- Best by: Enjoy within 2–3 weeks for peak flavor and texture.

Health Benefits
- Vitamin C boost: Fresh orange juice and zest deliver vitamin C, which supports immune function and skin health.
- Real ingredients: No artificial colors or flavors here—just fruit, dairy, and a touch of sweetener.
- Customizable sugar: You control the sweetness. Use honey, maple syrup, or reduce sugar to taste.
- Calcium and protein: Milk, cream, or Greek yogurt add a little protein and calcium, making this treat more satisfying.
What Not to Do
- Don’t skip the vanilla: It’s key to that signature creamsicle flavor.
- Don’t boil the dairy: Overheating can change the texture and dull the flavors.
- Don’t forget the pinch of salt: It makes the orange pop and balances sweetness.
- Don’t use only low-fat milk: You’ll get an icy pop. Include cream or yogurt for creaminess.
- Don’t over-zest: Too much white pith can add bitterness.
Zest lightly and only the orange part of the peel.
Alternatives
- Dairy-free version: Use full-fat coconut milk in place of milk and cream. Add 1–2 tablespoons coconut cream for extra richness. The result is lush with a faint tropical note.
- Refined sugar-free: Sweeten with honey or maple syrup.
Start with 3 tablespoons, taste, and adjust.
- Protein boost: Blend in 1 scoop of unflavored or vanilla protein powder, and add a splash more orange juice to balance thickness.
- Low-sugar option: Use a zero-calorie sweetener you like, such as allulose or monk fruit. Allulose freezes especially well and keeps pops soft.
- No popsicle mold: Freeze in small paper cups. Insert sticks after 45–60 minutes, once semi-firm.
- Creamsicle swirl: Reserve 1/4 cup cream mixed with 1 teaspoon sugar and a tiny splash of vanilla.
Layer the orange mixture and the vanilla cream for a marbled look.
- Orange-berry twist: Blend in a handful of strawberries or raspberries for a citrus-berry pop.
FAQ
Can I use store-bought orange juice?
Yes, but choose a not-from-concentrate juice with no added flavors for the best taste. Fresh-squeezed with zest will always be brighter, but quality store-bought works fine.
How do I prevent ice crystals?
Use enough fat (cream, coconut milk, or yogurt) and a liquid sweetener like honey or corn syrup. These help reduce iciness and keep the pops smoother.
Can I make this without a blender?
Yes.
Whisk everything vigorously, especially if using zest. Strain if you want a smoother texture. A blender just gives a fluffier, more even mix.
How long do they take to freeze?
Most molds need 4–6 hours.
For the cleanest unmolding and best texture, plan on overnight.
What if my pops are too tart?
Add more sweetener by 1 teaspoon at a time next batch, or include an extra tablespoon of cream. Sweetness dulls when frozen, so aim for a slightly sweeter mixture before freezing.
Can I make a smoothie instead?
Absolutely. Skip the freezing step and blend with a handful of ice.
Add a banana for extra body if you like.
Is there a way to make them more orange in color?
If your juice is pale, a tiny pinch of turmeric (truly a pinch) boosts color without changing flavor. Avoid artificial coloring if you want to keep it natural.
What molds work best?
Rigid silicone or hard plastic molds give the cleanest shape and release easily. Avoid very flimsy molds—they tend to crack when you pull the pops out.
Wrapping Up
This Orange Creamsicle brings back the classic flavor you grew up with, only brighter and made with real ingredients.
It’s quick to mix, easy to customize, and perfect for batch-making. Keep a stash in the freezer and you’ll always have a creamy, citrusy treat ready to go. Simple, cool, and just the right amount of sweet—that’s the magic of a good creamsicle.


Printable Recipe Card
Want just the essential recipe details without scrolling through the article? Get our printable recipe card with just the ingredients and instructions.