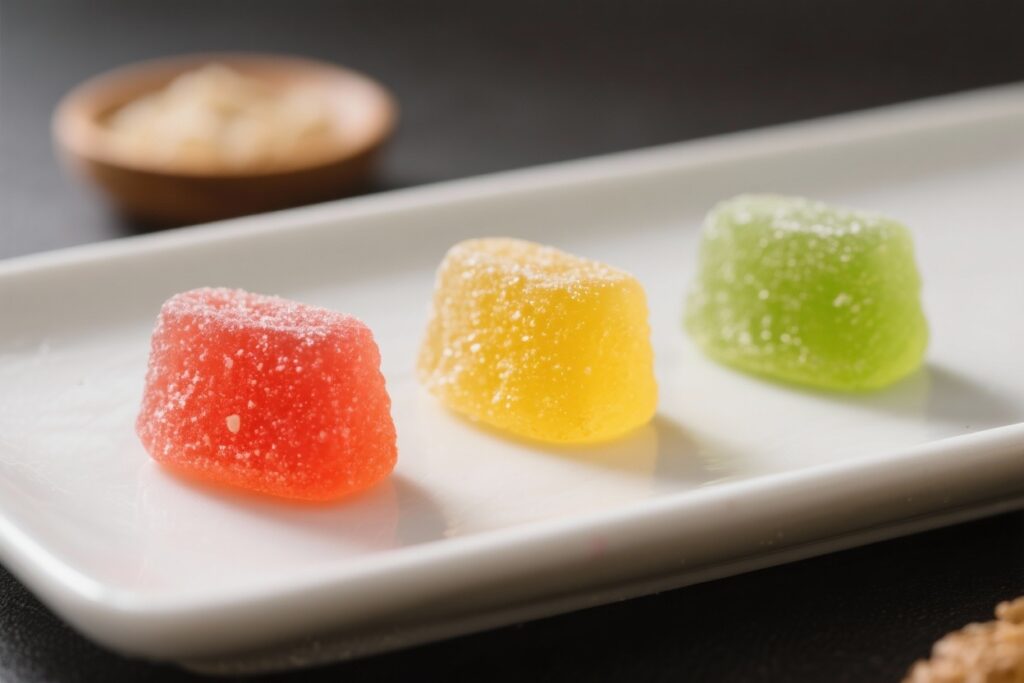
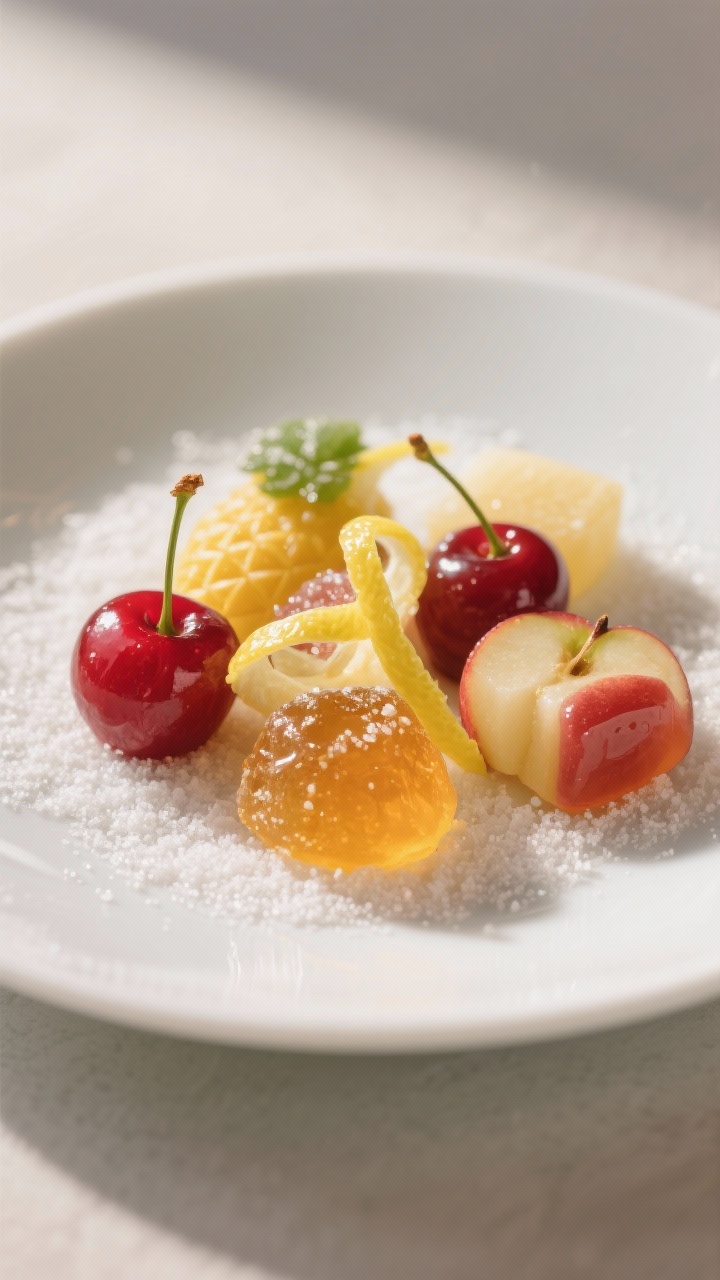
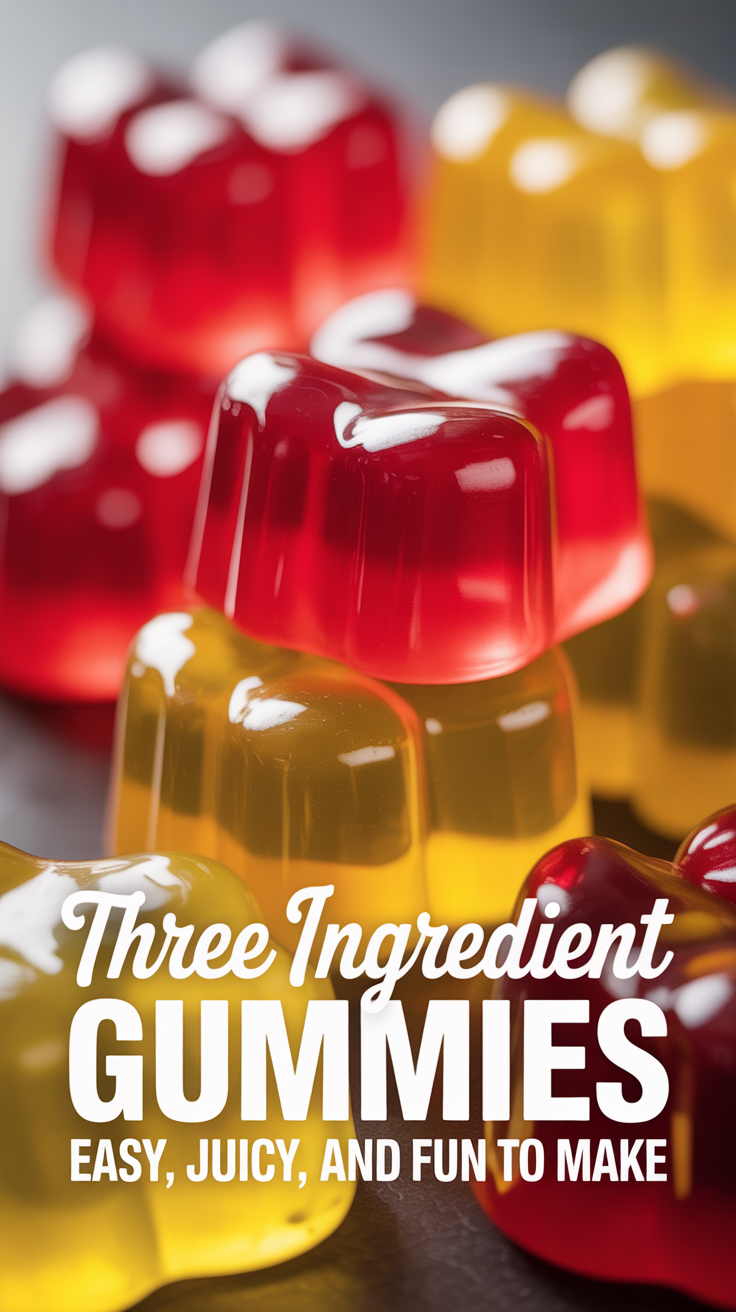
If you love a chewy snack that’s not loaded with mystery ingredients, these three ingredient gummies are a winner. They’re bright, fruity, and incredibly simple to make at home. You don’t need fancy equipment, and they come together in minutes.
Kids love them, adults snack on them, and you can tailor the flavors to whatever juice you have on hand. Make a batch for lunchboxes, post-workout snacks, or just to satisfy a sweet craving without grabbing store-bought candy.

Method
-
Prep your molds. Lightly grease silicone molds or a small 8×8-inch pan so the gummies release cleanly. Set them on a baking sheet for easy transfer to the fridge.
-
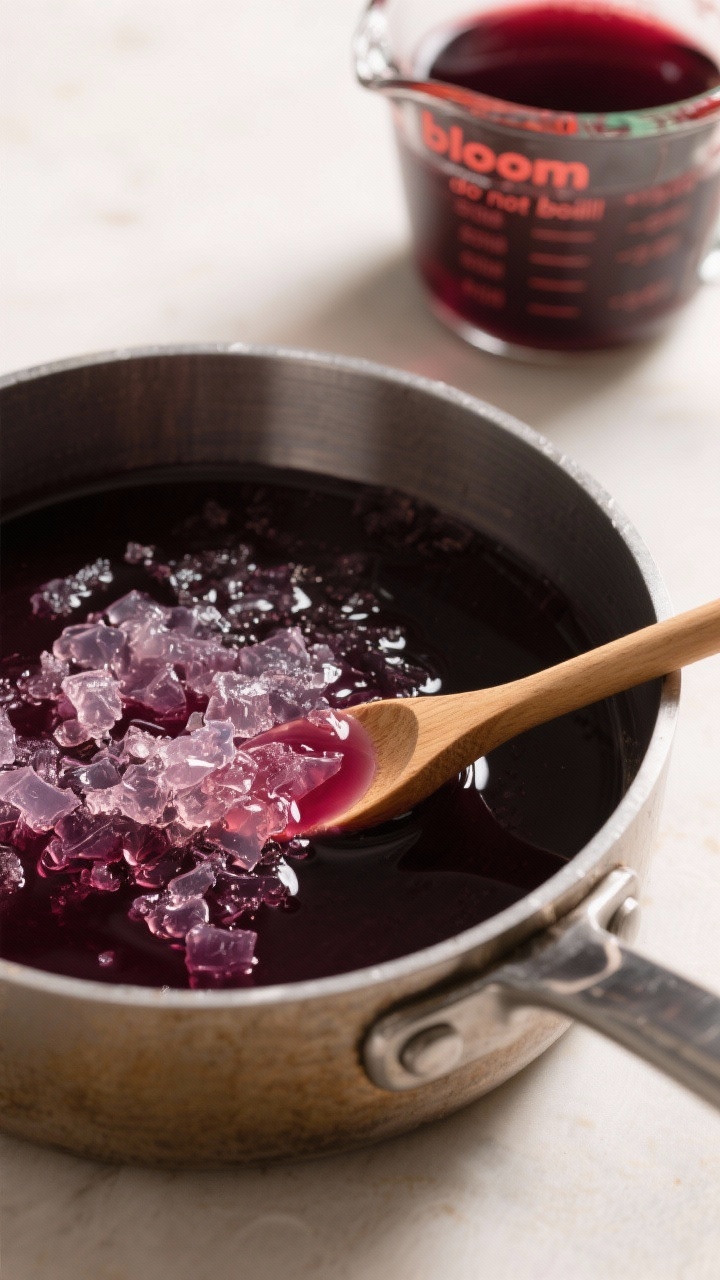
Bloom the gelatin. Pour 1 cup of the juice into a medium saucepan (off the heat). Sprinkle the gelatin evenly over the surface.
Let it sit for 5 minutes. It will absorb the liquid and swell.
-
Warm gently. Set the saucepan over low heat. Stir slowly as the gelatin melts.
Do not boil. You want the mixture smooth and clear, with no grainy bits.
-
Add sweetness. Stir in your sweetener and optional lemon juice. Taste carefully (it’s warm), and adjust.
Remember, sweetness dulls slightly once chilled.
-
Finish with remaining juice. Stir in the remaining 1 cup of juice. Keep it on low heat just until the mixture is fully combined and fluid. Avoid simmering.
-
Pour into molds. Transfer the liquid to a measuring cup with a spout for easy pouring.
Fill molds or pour into the prepared pan. Tap gently to release any bubbles.
-
Chill. Refrigerate for 45–90 minutes, or until firm and bouncy to the touch. Smaller shapes set faster.
-
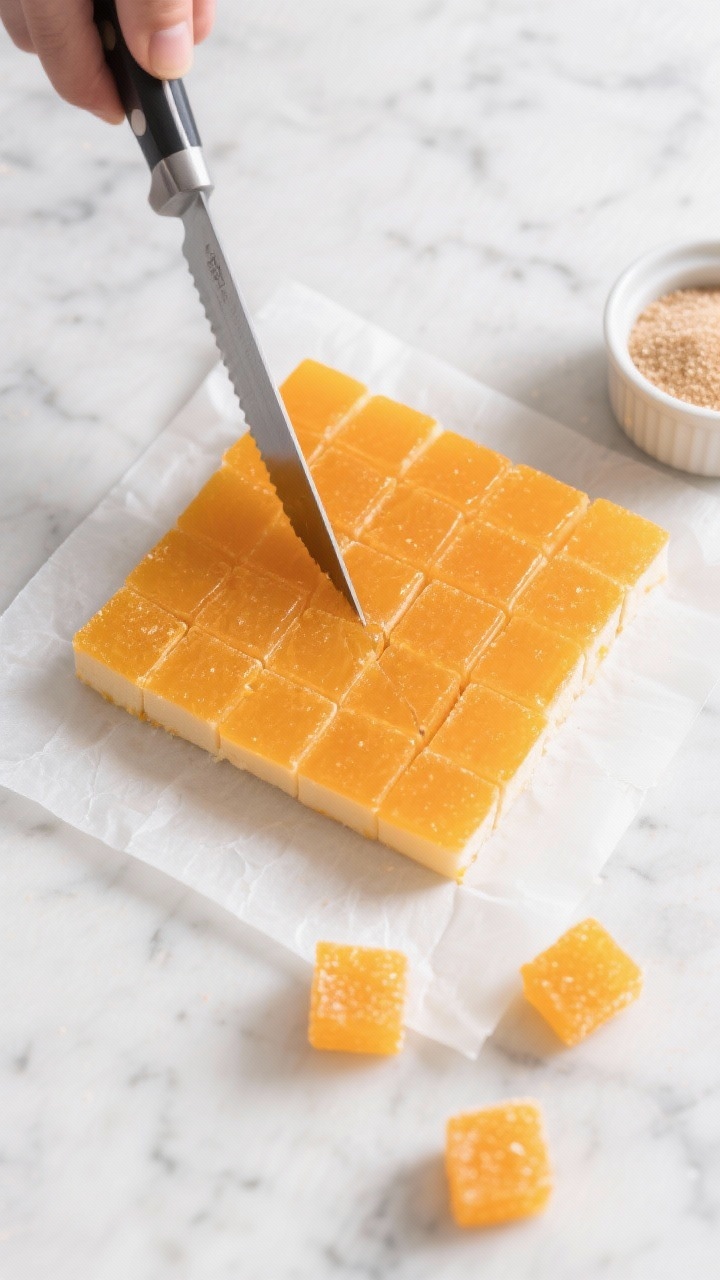
Unmold and cut. Pop gummies out of molds.
If using a pan, lift the set sheet and cut it into cubes with a sharp knife or small cookie cutters.
-
Serve or store. Enjoy right away, or store as directed below.
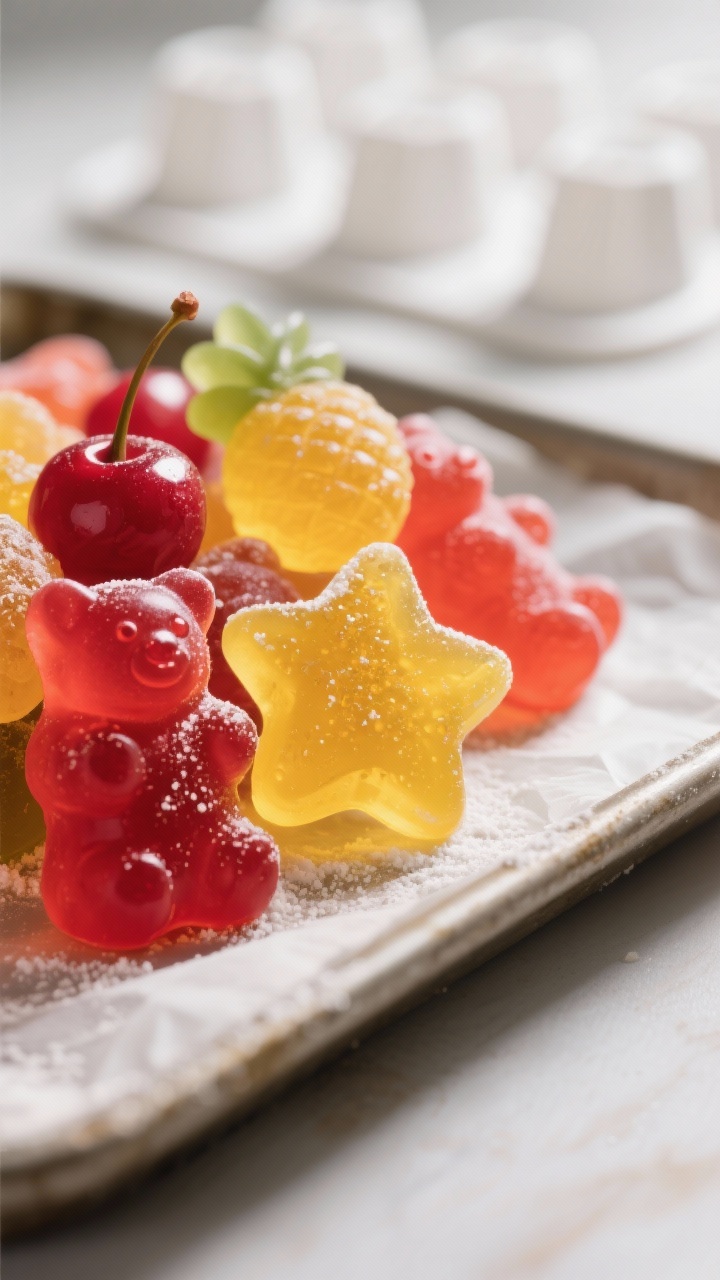
What Makes This Recipe So Good
- Only three ingredients. You’ll use fruit juice, gelatin, and a touch of sweetener. That’s it.
- Quick and easy. From stovetop to fridge, these are ready to eat in about an hour.
- Customizable flavor. Use any 100% fruit juice you like—apple, orange, cherry, grape, pineapple, or a blend.
- Better control. You choose the sweetness, the ingredients, and the size.
No artificial dyes or flavors unless you want them.
- Kid-friendly project. Simple steps and fun molds make this a great kitchen activity.
Ingredients
- 2 cups 100% fruit juice (cold or room temperature; avoid pulpy juices for best texture)
- 4 tablespoons unflavored powdered gelatin (about 4 packets or 28 grams)
- 2–4 tablespoons sweetener (honey, maple syrup, or sugar; adjust to taste and juice sweetness)
Optional but helpful:
- 1–2 teaspoons lemon juice for brightness, especially with very sweet juices
- Silicone candy molds or a small pan lined with parchment for easy removal
- Neutral oil or a quick spritz of cooking spray to lightly grease molds
Step-by-Step Instructions
- Prep your molds. Lightly grease silicone molds or a small 8×8-inch pan so the gummies release cleanly. Set them on a baking sheet for easy transfer to the fridge.
- Bloom the gelatin. Pour 1 cup of the juice into a medium saucepan (off the heat). Sprinkle the gelatin evenly over the surface.
Let it sit for 5 minutes. It will absorb the liquid and swell.
- Warm gently. Set the saucepan over low heat. Stir slowly as the gelatin melts.
Do not boil. You want the mixture smooth and clear, with no grainy bits.
- Add sweetness. Stir in your sweetener and optional lemon juice. Taste carefully (it’s warm), and adjust.
Remember, sweetness dulls slightly once chilled.
- Finish with remaining juice. Stir in the remaining 1 cup of juice. Keep it on low heat just until the mixture is fully combined and fluid. Avoid simmering.
- Pour into molds. Transfer the liquid to a measuring cup with a spout for easy pouring.
Fill molds or pour into the prepared pan. Tap gently to release any bubbles.
- Chill. Refrigerate for 45–90 minutes, or until firm and bouncy to the touch. Smaller shapes set faster.
- Unmold and cut. Pop gummies out of molds.
If using a pan, lift the set sheet and cut it into cubes with a sharp knife or small cookie cutters.
- Serve or store. Enjoy right away, or store as directed below.
How to Store
- Refrigerator: Keep gummies in an airtight container for up to 7 days. Separate layers with parchment if they’re sticky.
- Room temperature: Not recommended. They soften and can weep, especially in warm kitchens.
- Freezer: You can freeze for up to 2 months, but texture becomes chewier and slightly icy.
Thaw in the fridge.
- Anti-stick tip: Toss finished gummies in a tiny amount of cornstarch or powdered sugar if they feel tacky, shaking off excess.
Why This is Good for You
- Simpler ingredient list. You avoid artificial colors, flavors, and high fructose corn syrup commonly found in store-bought gummies.
- Protein from gelatin. Gelatin provides a small dose of protein and contributes to that satisfying chewy texture.
- Controlled sweetness. You decide how sweet to make them, and you can use honey or maple if you prefer less processed options.
- Fruit-forward. Using 100% fruit juice gives natural flavor and a bit of vitamin C, depending on the juice.
Pitfalls to Watch Out For
- Boiling the mixture. High heat can degrade gelatin and change the texture. Keep it low and slow.
- Skipping the bloom. If you don’t bloom the gelatin, you’ll get lumps or uneven set. Always sprinkle and rest for a few minutes first.
- Using highly acidic or enzyme-rich juices. Fresh pineapple, kiwi, mango, and papaya contain enzymes that can prevent setting.
Use pasteurized juice or briefly heat to deactivate enzymes.
- Too little gelatin. If you reduce the gelatin, you’ll get a soft jelly rather than a gummy. Stick to the ratio or adjust intentionally.
- Overly pulpy juices. Pulp can create a gritty bite. Strain if needed for a smooth finish.
Recipe Variations
- Sour gummies: Stir in 1–2 teaspoons citric acid after removing the mixture from heat.
Dust finished gummies with a little extra citric acid mixed with sugar for a tangy finish.
- Creamsicle style: Replace 1/2 cup of juice with coconut milk or a splash of cream. Add extra tablespoon of gelatin if the set is too soft.
- Herbal twist: Steep mint, basil, or ginger in the warmed juice for 10 minutes, then strain before adding gelatin. Adds a refreshing note.
- Electrolyte boost: Use an unsweetened electrolyte drink or coconut water for part of the liquid.
Sweeten to taste.
- Layered gummies: Pour half the mixture into molds and chill until just set. Add a second flavor on top for striped gummies.
- Vegan option: Swap gelatin for agar-agar powder. Use about 2–3 teaspoons agar for this volume.
Bring the mixture to a gentle simmer to activate agar, then pour and chill. Texture will be firmer and less bouncy.
FAQ
Can I use collagen peptides instead of gelatin?
No. Collagen peptides dissolve but do not gel.
You need traditional powdered gelatin or a gelling alternative like agar-agar.
Why didn’t my gummies set?
Common causes are not blooming the gelatin, using fresh enzyme-rich juices (like raw pineapple or kiwi), or overheating the mixture. Check your gelatin amount and make sure you didn’t boil it.
How do I make them more or less chewy?
For firmer, chewier gummies, increase gelatin to 5 tablespoons. For softer gummies, reduce to 3 tablespoons.
Keep the total liquid the same.
Can I reduce the sugar to zero?
Yes, as long as your juice tastes good to you unsweetened. Keep in mind that a little sweetness enhances flavor. You can also use stevia or monk fruit; start small and adjust.
Do I need special molds?
No.
Silicone candy molds are fun, but a lined pan works perfectly. Cut into bite-size cubes once set.
Can I add vitamins or supplements?
You can stir in vitamin C powder or powdered probiotics once the mixture cools slightly but is still pourable. Avoid high heat, which may degrade some supplements.
Always check dosage guidelines.
How long do they last?
They’re best within a week when stored in the fridge. Over time, they can dry out or sweat slightly, depending on your fridge humidity.
Can I use sparkling juice?
Sparkling beverages lose carbonation with heat and often bubble too much. For a smooth set, stick with still juice.
Final Thoughts
Three ingredient gummies are the kind of recipe you make once and keep on repeat.
They’re quick, flexible, and genuinely fun to customize. With a few simple tricks—like blooming the gelatin and keeping the heat gentle—you’ll get perfect, bouncy candies every time. Try a new juice each week, play with sour dusting or creamy swirls, and stash a container in the fridge for easy snacking.
Simple ingredients, great texture, and bright flavor—that’s a win in any kitchen.
Printable Recipe Card
Want just the essential recipe details without scrolling through the article? Get our printable recipe card with just the ingredients and instructions.