Cheesecake usually means a heavy dessert and a long nap. This version flips the script. It’s rich, creamy, and satisfying, but made with smart swaps that boost protein and trim the sugar.
You still get that classic tang and smooth texture, just with ingredients that support your goals. Keep it simple for a weeknight treat, or dress it up for guests—no one will guess it’s lighter.

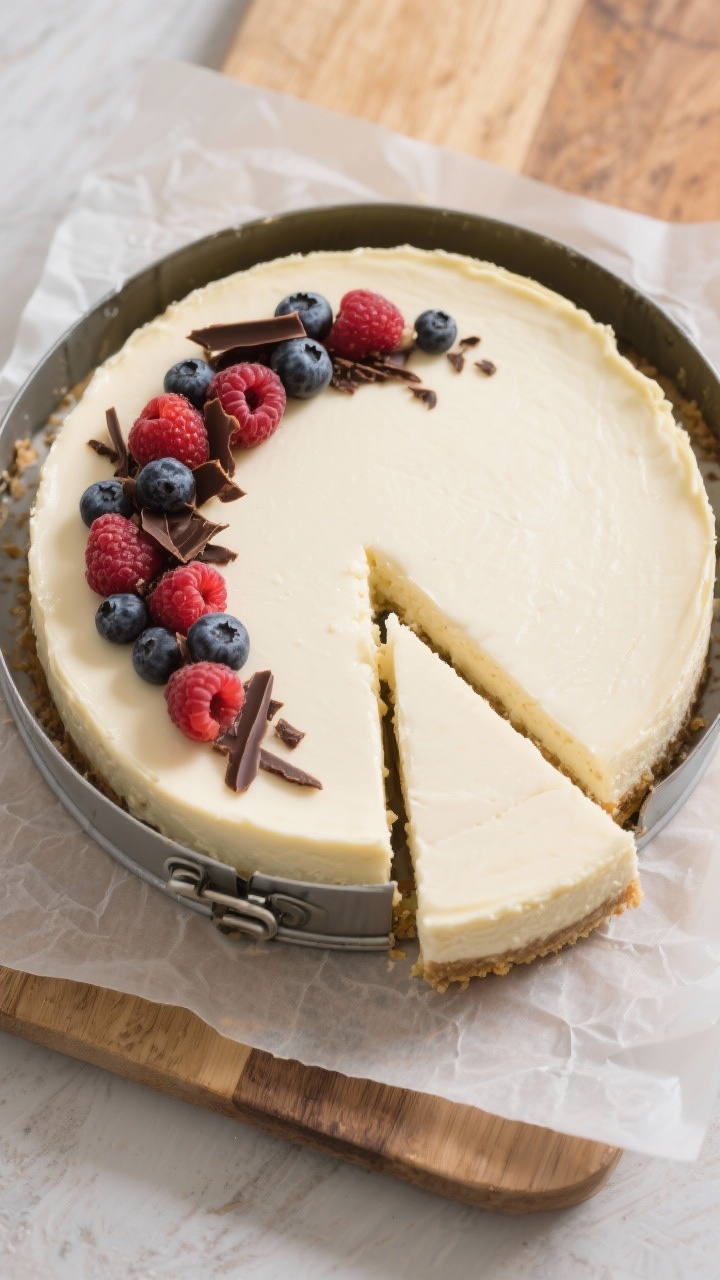
Protein Cheesecake – A Creamy, Lighter Dessert You’ll Actually Feel Good About
Ingredients
Method
-
Prep the pan. Heat the oven to 325°F (163°C). Line the bottom of an 8- or 9-inch springform pan with parchment and lightly grease the sides.
-
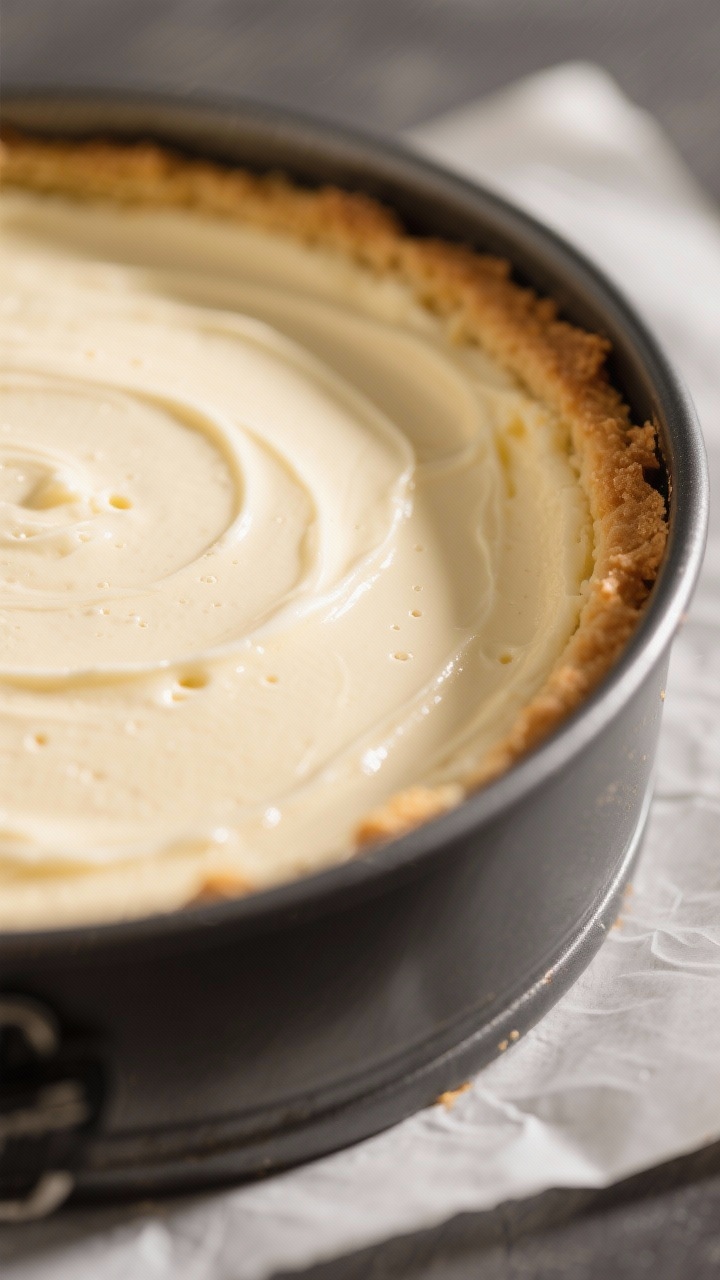
Make the crust. Stir the crushed crackers, sweetener, melted butter, and salt until the mixture looks like damp sand.
Press it firmly into the pan. Bake for 8 minutes, then set aside to cool slightly.
-
Soften the cream cheese. In a large bowl, beat the cream cheese with a hand mixer on medium until smooth and no lumps remain, about 1 minute.
-
Add yogurt and sweetener. Mix in the Greek yogurt and sweetener until creamy. Scrape the bowl so everything blends evenly.
-
Blend in dry ingredients. Sprinkle in the protein powder, cornstarch, salt, and vanilla.
Mix on low just until combined. The batter should be thick but pourable. If it’s very thick, whisk in 1–2 tablespoons of milk.
-
Add eggs last. Beat in the eggs one at a time on low speed, stopping as soon as they’re mixed in.
Overmixing adds air and can cause cracks.
-
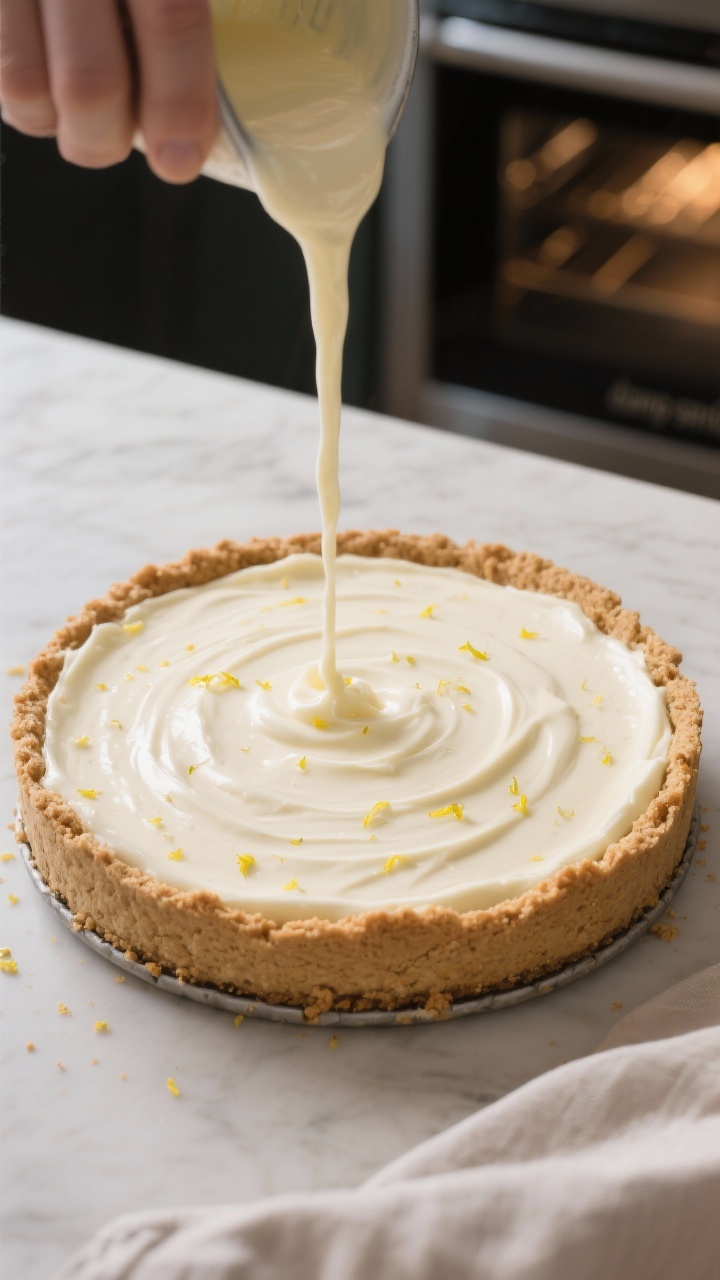
Pour and smooth. Pour the batter over the crust. Tap the pan gently on the counter to release air bubbles and smooth the top.
-
Bake gently. Bake for 35–45 minutes. The edges should be set and the center should still jiggle like gelatin when you nudge the pan.
If it’s sloshing, give it 5 more minutes.
-
Cool the smart way. Turn off the oven, crack the door, and let the cheesecake sit inside for 30 minutes. Then move it to the counter and cool to room temperature.
-
Chill to set. Cover and refrigerate for at least 4 hours, preferably overnight. This step completes the texture.
-
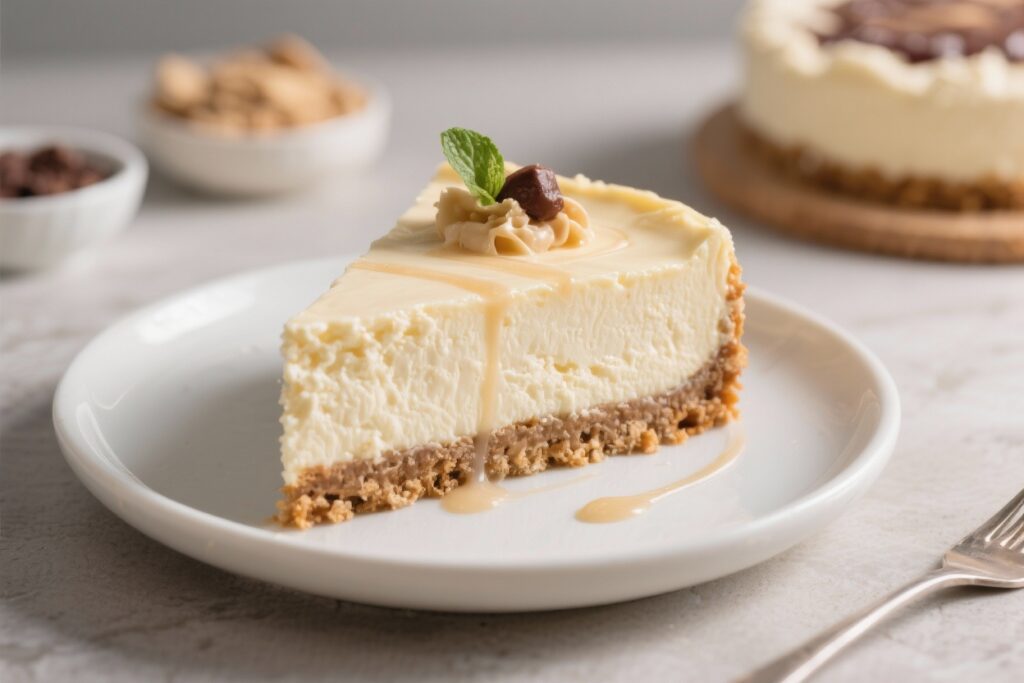
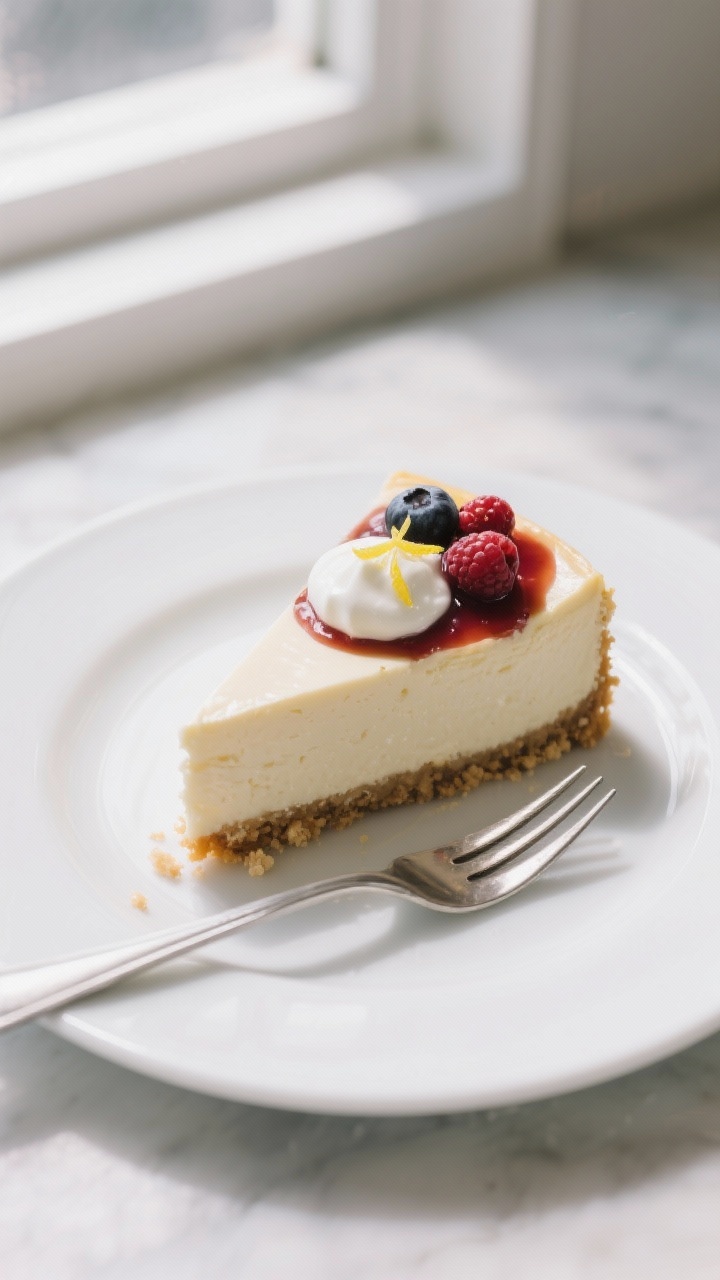
Slice and top. Run a thin knife around the edge, remove the ring, and slice with a warm knife.
Add your favorite toppings and serve.
What Makes This Special
This protein cheesecake keeps the beloved cheesecake flavor while sneaking in a hefty dose of protein. The base uses Greek yogurt and light cream cheese for a creamy texture without the heavy aftermath.
A quick whir in the mixer, a straightforward baking method, and you’re set. It’s a dessert you can enjoy on a regular Tuesday and not feel like you’ve gone off the rails.
- High protein, lower sugar: Great for keeping you full and steady.
- Familiar flavor: Still tangy, still creamy, just a little lighter.
- No-fuss technique: One bowl, one pan, no water bath required.
- Customizable: Change the crust, flavor, or toppings to fit your style.
Ingredients
- Crust:
- 1 cup finely crushed graham crackers (or oat/graham mix)
- 2 tablespoons granulated sweetener or sugar
- 3 tablespoons melted butter or coconut oil
- Pinch of salt
- Filling:
- 12 ounces light cream cheese, softened (reduced-fat, not fat-free)
- 1 cup plain 2% Greek yogurt
- 2 scoops (about 50–60 g) vanilla whey or whey-casein blend protein powder
- 2 large eggs, room temperature
- 1/3 to 1/2 cup granulated sweetener or sugar, to taste
- 1 tablespoon cornstarch (or 2 teaspoons arrowroot)
- 2 teaspoons pure vanilla extract
- Zest of 1 lemon (optional, for brightness)
- Pinch of salt
- Optional Toppings:
- Fresh berries
- Warm berry compote or sugar-free jam
- Shaved dark chocolate
- Lightly sweetened Greek yogurt dollop
Instructions
- Prep the pan. Heat the oven to 325°F (163°C). Line the bottom of an 8- or 9-inch springform pan with parchment and lightly grease the sides.
- Make the crust. Stir the crushed crackers, sweetener, melted butter, and salt until the mixture looks like damp sand.
Press it firmly into the pan. Bake for 8 minutes, then set aside to cool slightly.
- Soften the cream cheese. In a large bowl, beat the cream cheese with a hand mixer on medium until smooth and no lumps remain, about 1 minute.
- Add yogurt and sweetener. Mix in the Greek yogurt and sweetener until creamy. Scrape the bowl so everything blends evenly.
- Blend in dry ingredients. Sprinkle in the protein powder, cornstarch, salt, and vanilla.
Mix on low just until combined. The batter should be thick but pourable. If it’s very thick, whisk in 1–2 tablespoons of milk.
- Add eggs last. Beat in the eggs one at a time on low speed, stopping as soon as they’re mixed in.
Overmixing adds air and can cause cracks.
- Pour and smooth. Pour the batter over the crust. Tap the pan gently on the counter to release air bubbles and smooth the top.
- Bake gently. Bake for 35–45 minutes. The edges should be set and the center should still jiggle like gelatin when you nudge the pan.
If it’s sloshing, give it 5 more minutes.
- Cool the smart way. Turn off the oven, crack the door, and let the cheesecake sit inside for 30 minutes. Then move it to the counter and cool to room temperature.
- Chill to set. Cover and refrigerate for at least 4 hours, preferably overnight. This step completes the texture.
- Slice and top. Run a thin knife around the edge, remove the ring, and slice with a warm knife.
Add your favorite toppings and serve.
Keeping It Fresh
Store leftover cheesecake tightly covered in the fridge for up to 5 days. The texture actually improves after day one. For longer storage, freeze individual slices on a sheet pan until firm, then wrap in plastic and place in a freezer bag.
They’ll keep for up to 2 months. Thaw overnight in the fridge or at room temperature for about 45 minutes.
Pro tip: Add fresh fruit right before serving so it stays bright and juicy.
Why This is Good for You
- Protein helps satiety: Each slice delivers a meaningful protein boost that helps you feel full and steady between meals.
- Better balance: Using Greek yogurt and light cream cheese reduces saturated fat while keeping the creamy mouthfeel.
- Reasonable sugars: You control the sweetness. Go light with sugar or use a zero-calorie sweetener if that suits your needs.
- Portion-friendly: Satisfying texture means smaller slices still feel indulgent, which can help with mindful eating.
What Not to Do
- Don’t use fat-free cream cheese. It tends to be chalky and won’t set as nicely.
- Don’t overmix the batter. Excess air leads to cracks and a spongy texture.
- Don’t skip the cool-down steps. Fast temperature changes can cause splits and weeping.
- Don’t overbake. Pull it when the center still jiggles; it will firm up in the fridge.
- Don’t choose gritty protein. Some powders stay grainy.
A whey or whey-casein blend usually integrates smoothly.
Variations You Can Try
- Chocolate Swirl: Melt 2 ounces dark chocolate and swirl it into the batter before baking. Use chocolate protein powder for extra depth.
- Lemon Blueberry: Add zest of 2 lemons and fold 1 cup fresh blueberries into the batter. Finish with a lemony yogurt dollop.
- Cookie Crust: Swap grahams for crushed high-fiber cookies or chocolate wafers.
Adjust butter slightly if the crumbs are dry.
- Espresso: Stir 2 teaspoons instant espresso into the batter and top with a dusting of cocoa.
- No-Crust Cups: Bake in lined muffin tins (about 18–20 minutes). Great for portion control and quick snacks.
- Dairy-Light: Use lactose-free dairy products and a whey isolate if you’re sensitive. Note: Non-dairy yogurts vary; use a thick, unsweetened option if experimenting.
FAQ
Can I use plant-based protein powder?
Yes, but choose a very fine, neutral-flavored blend.
Plant proteins can be grainier and absorb more liquid. Start with 1 scoop, check texture, and add a splash of milk if needed.
How do I prevent cracks?
Mix on low, stop when combined, and avoid overbaking. The slow cool in the oven with the door cracked helps.
A thin run of a knife around the edge right after baking can also prevent the top from pulling as it cools.
Is a water bath necessary?
No. This lighter batter sets well without it. If you want ultra-smooth results, you can place a pan of hot water on the lower rack to add moisture to the oven, but it’s optional.
Can I make it sugar-free?
Yes.
Use your preferred granulated zero-calorie sweetener and a low- or no-sugar topping. Taste the batter before baking and adjust sweetness as needed.
What pan size works best?
An 8- or 9-inch springform pan is ideal. An 8-inch will be taller and may need a few extra minutes.
For bars, use an 8×8-inch square pan and line with a parchment sling.
Why is my cheesecake grainy?
It can be caused by cold cream cheese, gritty protein powder, or overbaking. Make sure the cream cheese is softened, use a smooth protein, and pull it while the center still jiggles.
Can I make it ahead?
Absolutely. Cheesecake tastes best the next day.
Bake the day before, chill overnight, and add toppings right before serving.
Wrapping Up
This protein cheesecake gives you the best of both worlds: creamy comfort and a solid protein boost. The method is simple, the ingredients are flexible, and the result feels like a treat without the heavy crash. Keep the base recipe on hand, then tweak flavors to match the season or your mood.
Dessert just got a little easier to enjoy—no second thoughts required.

Printable Recipe Card
Want just the essential recipe details without scrolling through the article? Get our printable recipe card with just the ingredients and instructions.