

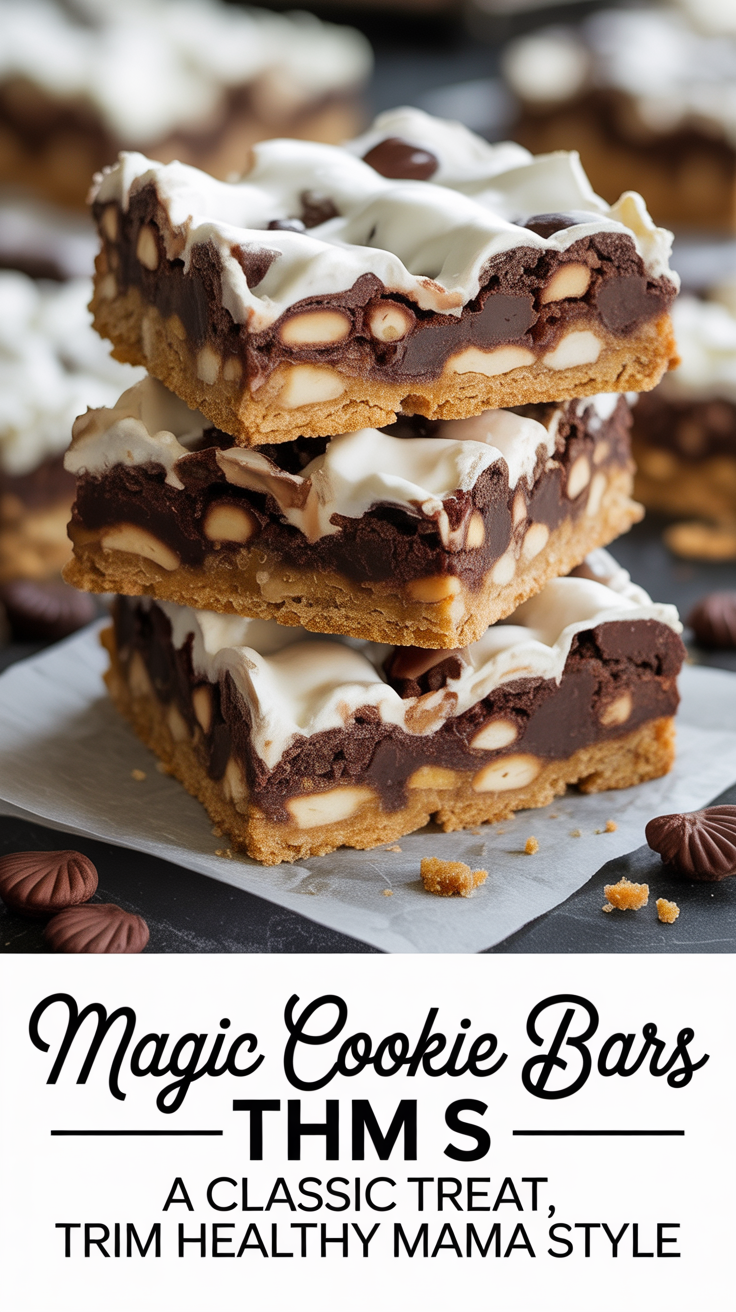
Magic Cookie Bars are that nostalgic, crowd-pleasing dessert you can count on for birthdays, potlucks, and slow Saturday afternoons. This version keeps all the gooey layers you love while fitting the Trim Healthy Mama S guidelines. You’ll get a crisp nut-and-coconut base, a silky “condensed milk” layer, and a shower of chocolate chips and toasted nuts on top.
It’s sweet without a sugar crash, rich without flour, and simple enough for a weeknight. If you’ve been missing the old-school bars, this is the one to bring back into your life—no guilt, just great flavor.

Magic Cookie Bars Thm S – A Classic Treat, Trim Healthy Mama Style
Ingredients
Method
-
Prep the pan: Line an 8×8-inch pan with parchment, letting it hang over the sides for easy lifting. Lightly spray the parchment.
-
Mix the crust: In a bowl, combine almond flour, shredded coconut, a pinch of sea salt, and granular sweetener.
Stir in melted butter and a splash of vanilla until the mixture resembles damp sand.
-
Press and par-bake: Press the crust firmly and evenly into the pan. Bake at 350°F (175°C) for about 8–10 minutes, just until lightly set and fragrant. Remove and set aside.
-
Make the “condensed milk” layer: In a small saucepan over medium-low heat, simmer heavy cream, butter, and powdered sweetener, stirring often, until slightly reduced and silky, 8–10 minutes.
Add a pinch of salt and vanilla. If you want it thicker, whisk in a tiny sprinkle of xanthan gum (start with 1/16 teaspoon), whisking vigorously to avoid clumps.
-
Layer it up: Sprinkle a layer of unsweetened coconut and chopped nuts over the warm crust. Pour the warm “condensed milk” sauce evenly over the top.
-
Add chocolate: Scatter sugar-free chocolate chips across the surface.
Gently press them into the sauce so they embed slightly.
-
Bake: Return the pan to the oven and bake at 350°F (175°C) for 15–20 minutes, until the edges are golden and the center looks set but still a bit soft.
-
Cool completely: Let the bars cool in the pan, then chill for at least 1–2 hours to firm up. This step makes clean cuts and perfect layers.
-
Slice and finish: Use the parchment to lift the slab out. Cut into squares with a sharp knife.
Sprinkle flaky sea salt on top if you like a sweet-salty finish.
What Makes This Recipe So Good

- Classic taste, smart swaps: You get the layered magic of the original, but made with low-glycemic sweeteners and healthy fats.
- One pan, minimal fuss: The crust presses in, the sauce blends quickly, and everything bakes together beautifully.
- No special skills: If you can stir and spread, you can make these bars.
- Customizable: Choose your favorite nuts, add a sprinkle of salt, or switch the chocolate style to fit your preference.
- Satisfying: Rich, chewy, and chocolatey, with enough texture to keep every bite interesting.
Shopping List
- Crust:
- Almond flour
- Unsweetened shredded coconut
- Butter (or coconut oil)
- Granular erythritol or allulose blend
- Vanilla extract
- Sea salt
- Sweetened “condensed milk” layer:
- Heavy cream
- Butter
- Powdered erythritol or powdered allulose
- Vanilla extract
- Pinch of sea salt
- Xanthan gum (optional, for thickness)
- Toppings:
- Sugar-free chocolate chips (Lily’s style or stevia-sweetened)
- Chopped pecans or walnuts
- Unsweetened shredded coconut
- Flaky sea salt (optional, for finishing)
- Pan and basics:
- 8×8-inch baking pan
- Parchment paper
- Nonstick spray
Step-by-Step Instructions

- Prep the pan: Line an 8×8-inch pan with parchment, letting it hang over the sides for easy lifting. Lightly spray the parchment.
- Mix the crust: In a bowl, combine almond flour, shredded coconut, a pinch of sea salt, and granular sweetener.
Stir in melted butter and a splash of vanilla until the mixture resembles damp sand.
- Press and par-bake: Press the crust firmly and evenly into the pan. Bake at 350°F (175°C) for about 8–10 minutes, just until lightly set and fragrant. Remove and set aside.
- Make the “condensed milk” layer: In a small saucepan over medium-low heat, simmer heavy cream, butter, and powdered sweetener, stirring often, until slightly reduced and silky, 8–10 minutes.
Add a pinch of salt and vanilla. If you want it thicker, whisk in a tiny sprinkle of xanthan gum (start with 1/16 teaspoon), whisking vigorously to avoid clumps.
- Layer it up: Sprinkle a layer of unsweetened coconut and chopped nuts over the warm crust. Pour the warm “condensed milk” sauce evenly over the top.
- Add chocolate: Scatter sugar-free chocolate chips across the surface.
Gently press them into the sauce so they embed slightly.
- Bake: Return the pan to the oven and bake at 350°F (175°C) for 15–20 minutes, until the edges are golden and the center looks set but still a bit soft.
- Cool completely: Let the bars cool in the pan, then chill for at least 1–2 hours to firm up. This step makes clean cuts and perfect layers.
- Slice and finish: Use the parchment to lift the slab out. Cut into squares with a sharp knife.
Sprinkle flaky sea salt on top if you like a sweet-salty finish.
Keeping It Fresh
Store the bars in an airtight container in the fridge for up to 1 week. They stay firm and chewy when chilled, and the flavors settle nicely after a day. For longer storage, freeze in a single layer, then stack with parchment between layers.
Thaw in the fridge or at room temperature for 20–30 minutes before serving.

Why This is Good for You
- Steady energy: These bars rely on healthy fats and low-glycemic sweeteners, so they’re satisfying without the sugar crash.
- Grain-free: Almond flour and coconut keep it gluten-free and Trim Healthy Mama S-friendly.
- Customizable sweetness: You control the sweetener amount and type, so you can match your taste and goals.
- Nutrient-dense: Nuts bring fiber, minerals, and healthy fats that help with satiety.
What Not to Do
- Don’t skip the chill time: Cutting too soon leads to messy, soft bars that won’t hold together.
- Don’t overdo the xanthan: A little thickens; too much turns gummy.
- Don’t use sweetened coconut: It adds sugar and throws the recipe off plan.
- Don’t burn the crust: Par-bake lightly; a dark crust can taste bitter and crumbly.
- Don’t use high-carb chocolate chips: Choose sugar-free or stevia-sweetened to stay THM S-compliant.
Alternatives
- Dairy-free: Use coconut cream in place of heavy cream and coconut oil for butter. Pick dairy-free, sugar-free chocolate chips.
- Nut-free crust: Swap almond flour for finely ground sunflower seed meal. Flavor stays toasty and rich.
- Different nuts: Pecans, walnuts, almonds, or macadamias all work.
Toast them lightly for a deeper flavor.
- Flavor twist: Add a touch of orange zest, a pinch of cinnamon, or a few sugar-free butterscotch chips for variety.
- Extra chewy: Stir a little unsweetened coconut into the sauce before pouring to boost texture.
FAQ
Can I use monk fruit sweetener?
Yes. Most “monk fruit” blends are paired with erythritol or allulose and work well. Choose powdered for the sauce to avoid graininess, and adjust sweetness to taste.
How do I prevent a grainy sauce?
Use powdered sweetener and keep the heat medium-low.
Stir often and let it gently reduce. If needed, blend the sauce briefly with an immersion blender to smooth it out.
Do I have to par-bake the crust?
It helps set the base so the bars slice cleanly. Skipping it can make the crust softer and more crumbly, especially with the warm sauce on top.
What size pan works best?
An 8×8-inch pan gives thick, bakery-style bars.
A 9×9-inch pan works too; just check for doneness a few minutes earlier since the layer will be thinner.
How sweet are these compared to traditional bars?
They’re pleasantly sweet but not cloying. If you prefer a sweeter bite, add a tablespoon or two more powdered sweetener to the sauce.
Can I make these ahead for a party?
Absolutely. Make them a day in advance and refrigerate.
Slice just before serving for the cleanest edges and best texture.
Do they freeze well?
Yes. Freeze the cut bars on a tray, then transfer to a container with parchment between layers. They keep well for up to 2 months.
In Conclusion
Magic Cookie Bars Thm S bring back a beloved dessert with smart, simple swaps.
They’re rich, layered, and satisfying, with that signature mix of coconut, nuts, and chocolate. The steps are easy, the ingredients are flexible, and the results are consistent. Keep a batch in the fridge for guests, celebrations, or a cozy treat that still fits your goals.

Printable Recipe Card
Want just the essential recipe details without scrolling through the article? Get our printable recipe card with just the ingredients and instructions.