

If you love meals that are simple, satisfying, and loaded with flavor, Cheesy Bacon Chicken will quickly become a favorite. It’s crispy, creamy, and smoky all at once, with tender chicken, crunchy bacon, and gooey melted cheese. This is the kind of dish that feels special but doesn’t need a long ingredient list or complicated steps.
Pair it with mashed potatoes, rice, or a crisp salad, and you’ve got a hearty dinner that works on busy weeknights and laid-back weekends alike.
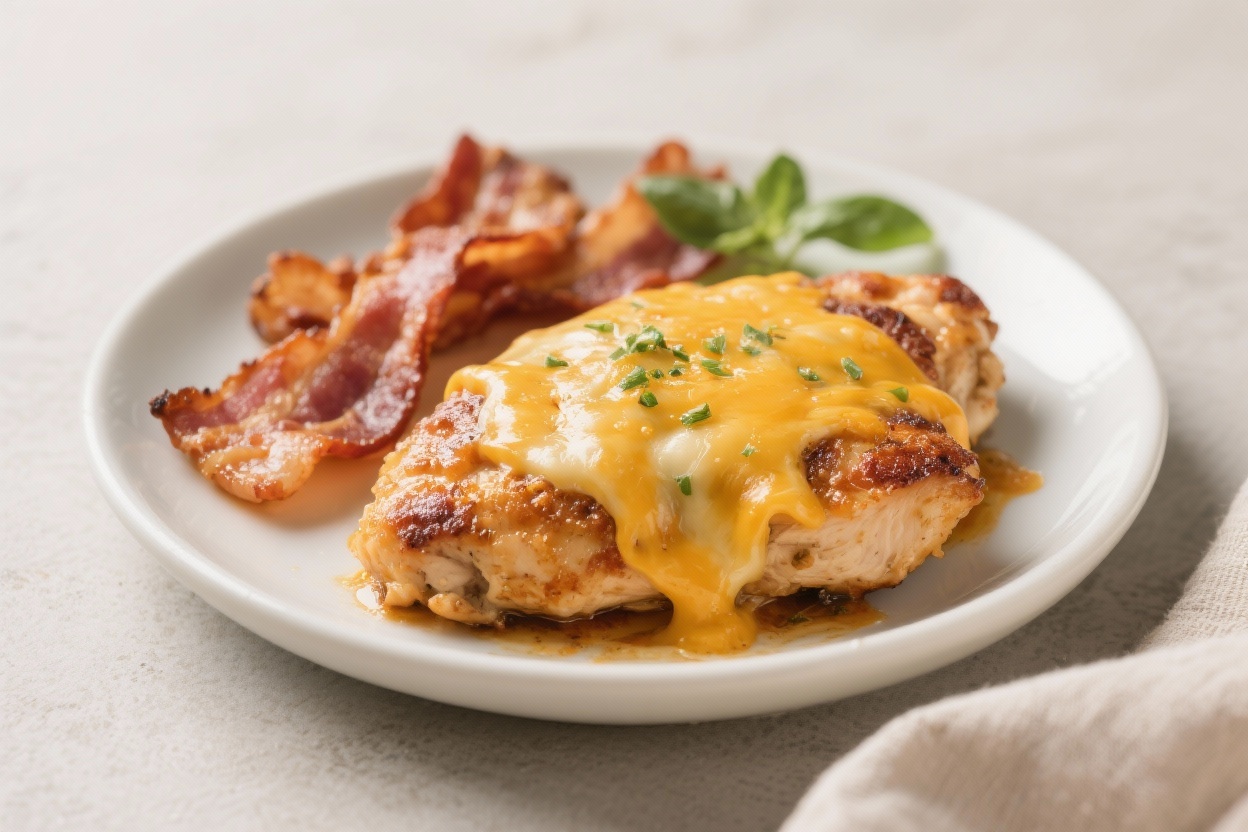
Cheesy Bacon Chicken – Comfort Food With Crisp, Melty Goodness
Ingredients
Method
-
Prep the chicken: Pat the chicken dry and pound to an even 1/2–3/4 inch thickness. Season both sides with salt, pepper, smoked paprika, garlic powder, and Italian seasoning.
-
Crisp the bacon: In a large oven-safe skillet, cook the chopped bacon over medium heat until crispy.
Transfer the bacon to a paper-towel-lined plate. Leave 1–2 tablespoons of bacon drippings in the pan.
-
Sear the chicken: Add a splash of olive oil or butter to the bacon drippings if needed. Sear chicken 4–5 minutes per side until golden.
The chicken doesn’t need to be fully cooked yet. Remove to a plate.
-
Sauté aromatics: In the same skillet, add diced onion and cook 2–3 minutes until softened. Stir in minced garlic for 30 seconds until fragrant.
-
Make a simple pan sauce (optional but recommended): Pour in the cream or a little chicken broth, scraping up browned bits.
Let it simmer 1–2 minutes to slightly thicken. Taste and adjust salt and pepper.
-
Assemble: Return the chicken to the skillet. Spoon onions and sauce over each piece.
Sprinkle shredded cheese evenly over the top. Scatter the crispy bacon across the cheese.
-
Melt and finish: Reduce heat to low and cover the skillet for 3–5 minutes, or place the skillet under a broiler for 1–2 minutes, until the cheese is melted and bubbly and the chicken reaches an internal temperature of 165°F (74°C).
-
Garnish and serve: Sprinkle with chopped chives or parsley. Serve hot with your favorite sides.
What Makes This Recipe So Good

- Big flavor, minimal effort: Bacon, garlic, and cheese bring restaurant-style taste with simple prep.
- Kid- and crowd-friendly: Familiar ingredients make it a hit at the table, even with picky eaters.
- Versatile: Make it in a skillet, in the oven, or even as a casserole. It pairs well with many sides.
- Great texture: Juicy chicken, crisp bacon, and bubbly cheese deliver that perfect bite.
- Easy to customize: Swap cheeses, add veggies, or adjust spices to suit your mood.
What You’ll Need
- Chicken: 4 boneless, skinless chicken breasts (about 2 pounds total), pounded to even thickness
- Bacon: 6–8 slices, chopped
- Cheese: 1½ cups shredded cheese (cheddar, mozzarella, Monterey Jack, or a blend)
- Cream or broth: 1/3 cup heavy cream or half-and-half (optional but adds richness)
- Onion: 1 small yellow onion, finely diced
- Garlic: 3 cloves, minced
- Seasonings: 1 teaspoon smoked paprika, 1 teaspoon Italian seasoning, 1/2 teaspoon garlic powder
- Salt and pepper: To taste
- Olive oil or butter: 1–2 tablespoons, for searing
- Fresh herbs (optional): Chives, parsley, or green onions for garnish
Step-by-Step Instructions
- Prep the chicken: Pat the chicken dry and pound to an even 1/2–3/4 inch thickness. Season both sides with salt, pepper, smoked paprika, garlic powder, and Italian seasoning.
- Crisp the bacon: In a large oven-safe skillet, cook the chopped bacon over medium heat until crispy.
Transfer the bacon to a paper-towel-lined plate. Leave 1–2 tablespoons of bacon drippings in the pan.
- Sear the chicken: Add a splash of olive oil or butter to the bacon drippings if needed. Sear chicken 4–5 minutes per side until golden.
The chicken doesn’t need to be fully cooked yet. Remove to a plate.
- Sauté aromatics: In the same skillet, add diced onion and cook 2–3 minutes until softened. Stir in minced garlic for 30 seconds until fragrant.
- Make a simple pan sauce (optional but recommended): Pour in the cream or a little chicken broth, scraping up browned bits.
Let it simmer 1–2 minutes to slightly thicken. Taste and adjust salt and pepper.
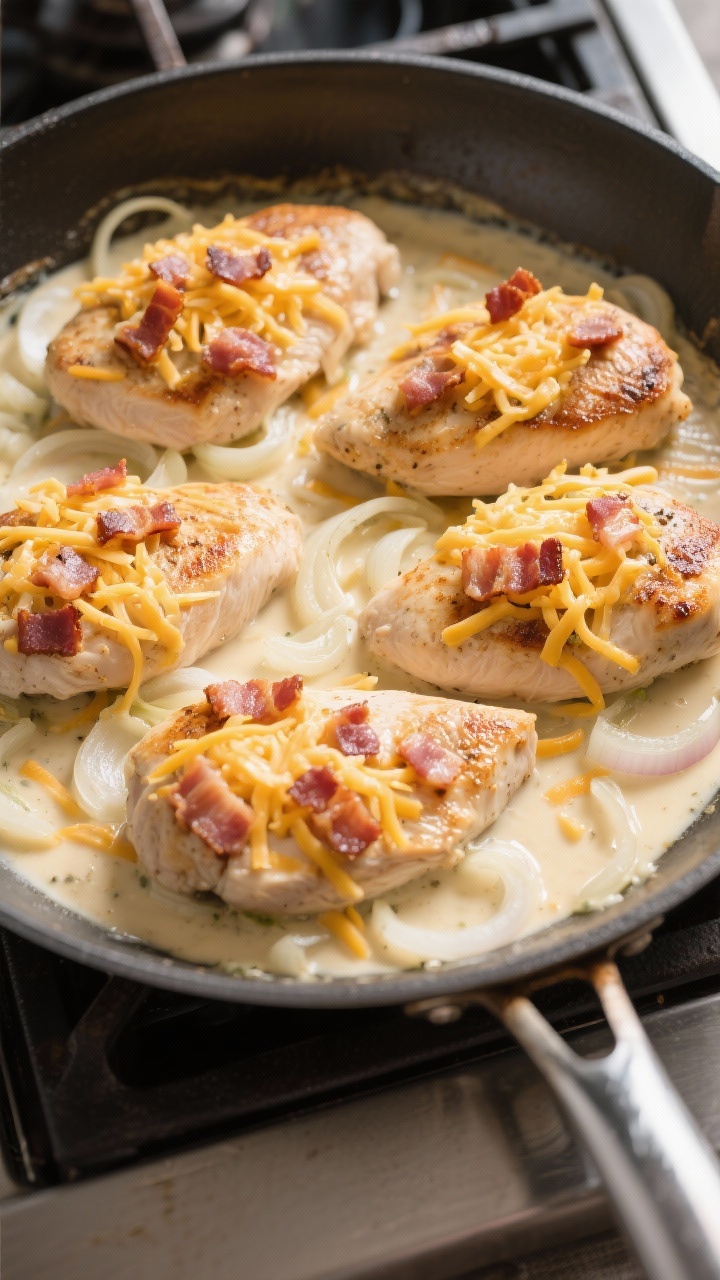
- Assemble: Return the chicken to the skillet. Spoon onions and sauce over each piece.
Sprinkle shredded cheese evenly over the top. Scatter the crispy bacon across the cheese.
- Melt and finish: Reduce heat to low and cover the skillet for 3–5 minutes, or place the skillet under a broiler for 1–2 minutes, until the cheese is melted and bubbly and the chicken reaches an internal temperature of 165°F (74°C).
- Garnish and serve: Sprinkle with chopped chives or parsley. Serve hot with your favorite sides.
Storage Instructions
- Refrigerator: Store leftovers in an airtight container for up to 4 days.
- Freezer: Freeze in a tightly sealed container for up to 2 months.
Thaw in the fridge overnight.
- Reheating: Warm gently in a covered skillet over low heat or in the oven at 325°F until heated through. Add a splash of broth or cream if it seems dry. Avoid microwaving too long to prevent rubbery chicken.

Health Benefits
- High-quality protein: Chicken breast provides lean protein that supports muscle repair and keeps you full.
- Calcium from cheese: Helps maintain bone health when enjoyed as part of a balanced diet.
- Customizable fat content: Use center-cut bacon, lighter cheese, or half-and-half instead of heavy cream to reduce saturated fat.
- Add veggies easily: Stir in spinach, mushrooms, or bell peppers to increase fiber, vitamins, and antioxidants.
Common Mistakes to Avoid
- Skipping the pat-dry step: Wet chicken won’t sear well.
Dry it first for a good crust.
- Overcooking the chicken: Use a thermometer and pull at 165°F. Overcooked chicken turns tough quickly.
- Too much liquid: The pan sauce should be light. If it’s watery, simmer another minute to reduce before adding cheese.
- Not using even thickness: Pound the chicken evenly so it cooks at the same rate.
- Burning the garlic: Add it late and cook briefly.
Burnt garlic tastes bitter and can overpower the dish.
Alternatives
- Cheese swaps: Try provolone for extra melt, pepper jack for heat, or gouda for smokiness.
- No bacon option: Use turkey bacon or skip it and add sautéed mushrooms or sun-dried tomatoes for depth.
- Different cuts: Use boneless chicken thighs for extra juiciness. Adjust cooking time slightly.
- Add veggies: Layer spinach under the cheese, or sauté bell peppers, broccoli florets, or zucchini with the onions.
- Low-carb idea: Serve with cauliflower mash or roasted veggies instead of rice or potatoes.
- Spice it up: Add red pepper flakes, a pinch of cayenne, or a drizzle of hot honey on top.
- Oven-baked version: Place seasoned chicken in a baking dish, top with onions, a splash of cream, cheese, and bacon. Bake at 400°F for 18–22 minutes, until 165°F.
FAQ
Can I make this ahead?
Yes.
Sear the chicken and cook the bacon, then assemble everything in a baking dish. Cover and refrigerate up to 24 hours. Bake when ready to eat, adding a few extra minutes if it’s cold from the fridge.
What’s the best cheese for melting?
Mozzarella and Monterey Jack melt smoothly, while cheddar adds sharpness.
A blend gives you the best of both. Avoid pre-shredded cheese if you can—block cheese melts better.
How do I keep the bacon crispy?
Cook it until just shy of fully crisp, then add it on top right before melting the cheese. If you want extra crunch, reserve a little bacon and sprinkle it after the cheese melts.
Can I use rotisserie chicken?
You can, but skip the searing step.
Warm the onions and sauce in a skillet, add shredded rotisserie chicken, then top with cheese and bacon. Heat until bubbly.
Is there a dairy-free version?
Use a dairy-free cheese that melts well and swap the cream for a splash of unsweetened almond milk or coconut milk. Taste and adjust seasonings, since dairy-free cheeses can be milder.
What sides go well with this?
Mashed potatoes, rice, buttered noodles, or garlic bread are classic.
For lighter sides, try roasted green beans, a simple salad, or steamed broccoli.
Why is my chicken tough?
It was likely overcooked or too thin. Use even thickness, cook over medium heat, and check temperature. Rest the chicken for a few minutes before serving.
Wrapping Up
Cheesy Bacon Chicken is the kind of dinner that makes everyone linger at the table a little longer.
It’s simple to prep, full of comforting flavors, and easy to tweak based on what you have. With crispy bacon, melty cheese, and juicy chicken, it feels like a treat without a lot of fuss. Keep this recipe in your weeknight rotation, and you’ll always have a guaranteed crowd-pleaser ready to go.


Printable Recipe Card
Want just the essential recipe details without scrolling through the article? Get our printable recipe card with just the ingredients and instructions.